
Want to hear something controversial?
A small trim around your cat’s rear can save you stinky laundry, painful mats, and extra baths.
A sanitary trim shortens fur around the anus, tail base, and inner thighs so feces can’t cling and mats don’t form.
This post shows when a trim is needed, how to set up a calm micro-session, the tools to use, step-by-step clipping tips, and simple aftercare so your cat stays comfortable and you spend less time cleaning.
Immediate Hygiene Guidance for Cat Rear-Area Grooming

A sanitary trim shortens fur around your cat’s anus, the underside and base of the tail, and the inner back thighs. You’re trying to prevent feces from sticking, reduce mats, lower odor, and avoid skin irritation without changing how your cat looks from the front or sides.
Cats self-groom about 2–3% of their day, and roughly 3% of that grooming focuses on the anogenital region. That’s about one minute of butt-focused licking in 24 hours. Works fine for short-haired cats or cats with firm stools, but long fur can trap waste faster than a cat can clean it. If you’re finding dried feces stuck between brushings, bathing your cat every few days, or constantly cutting poop out of fur despite regular maintenance, a sanitary trim is warranted.
Signs your cat needs a sanitary trim include visible clumps of waste after litter-box visits, a strong smell even after brushing, recurrent mats near the tail base or thighs, staining on bedding or furniture, or your cat scooting more than usual. Before you begin trimming, complete these five preparation steps:
-
Choose a small, quiet room like a bathroom where your cat can’t bolt and you have good lighting.
-
Gently lift your cat’s tail and look at the fur directly around the anus and under the tail base to identify the trim zone.
-
Clean any stuck debris first by holding a warm, damp washcloth against the area for 15–30 seconds to soften waste, then dab it away. Never scrub.
-
Check for tight mats by running your fingers through the fur. If you feel a solid, felted blanket or can’t slip a finger between the mat and skin, stop and call a groomer.
-
Watch your cat’s body language throughout: flattened ears, growling, tail thrashing, or attempts to escape mean you stop immediately, give a treat, and try again later or book professional help.
Preparing Cats for Sanitary Grooming Sessions

Set up your trimming space before you bring your cat in. Lay a towel over a non-slip mat on a countertop or table at a comfortable working height. Gather all tools, treats, and a helper if possible so you’re not hunting for scissors mid-session.
Use “micro-sessions” to keep stress low. Work for about one minute, then pause, offer a treat, and let your cat settle before the next minute of trimming. This prevents the tail thrashing and escape attempts that make accidents more likely. If your cat tolerates the first session well, you can gradually extend the work window, but one calm minute beats five minutes of struggle.
Stop the moment your cat growls, hisses, or tries to bite. A partially finished trim that keeps everyone safe is better than a complete trim that ends with scratches, nicks, or a cat who hides for two days. You can always finish tomorrow or hand the job to a groomer.
Gentle Handling Approaches
If your cat is wriggly but not aggressive, try a loose towel wrap: lay the towel flat, place your cat in the center, fold one side over the shoulders and front legs, tuck the other side under the body, and leave the rear end exposed. This gives your cat a cozy boundary without full restraint.
For the actual trimming, use the “finger-barrier technique.” Gently lift the tail with one hand, then slide the index and middle fingers of that same hand between the skin and the fur you’re about to cut. Your fingers form a safety buffer so the blade or scissors never touch skin directly, and you can feel if your cat shifts suddenly.
Tools and Equipment for Cat Sanitary Trimming
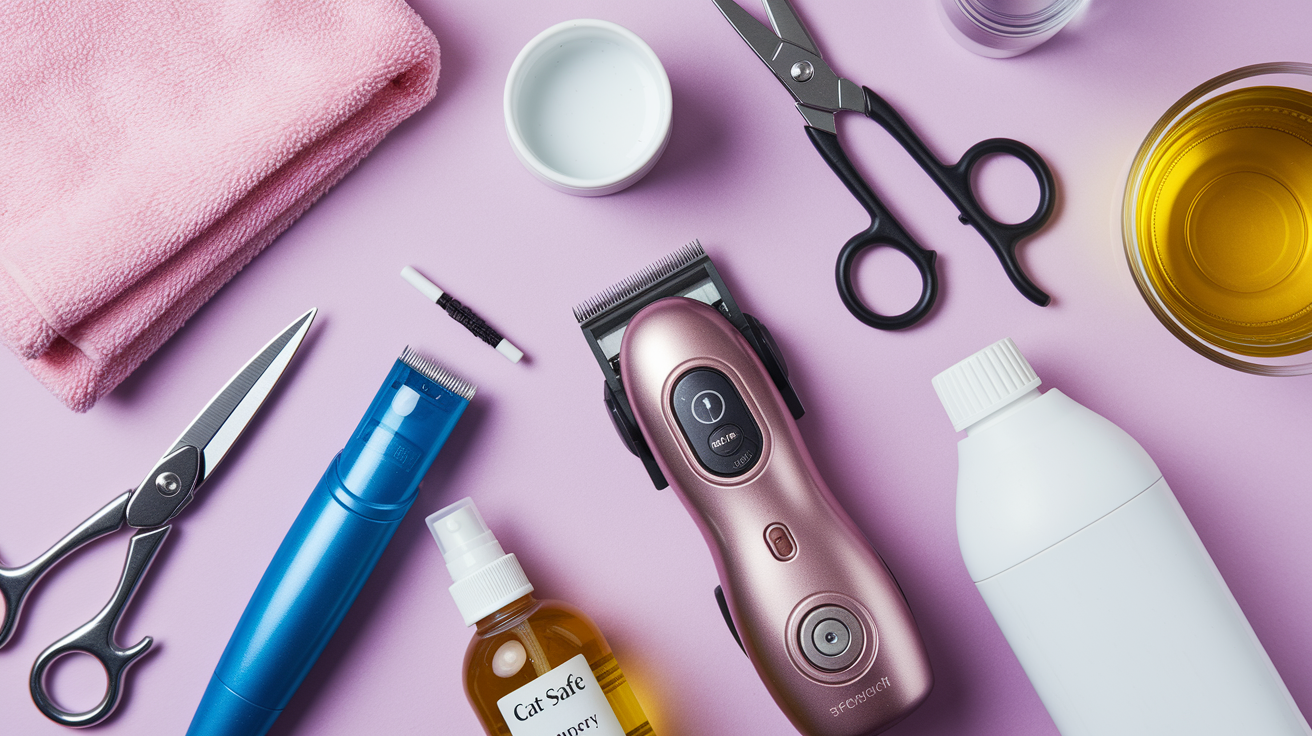
The right tools make sanitary trimming safer and faster. Small cordless trimmers are quieter and lighter than full-size clippers, which matters for cats who startle at motor noise or heavy vibration. A guarded trimmer or a 5-in-1 adjustable trimmer works well for tight zones like the inner thighs and around the genitals.
Blunt-tip or ball-tip scissors are useful for careful finishing work when your cat is calm, but avoid them if your cat is squirmy. One sudden twist can turn safe scissors into a puncture risk. Clippers with a size 10 blade (cutting length roughly 1.5–1.8 mm) are the professional standard for sanitary work because they leave enough fur to protect skin while removing the bulk that traps waste.
Here are six core tools and their best uses:
- Cordless trimmer or 5-in-1 trimmer – quiet, lightweight, ideal for noise-sensitive cats and delicate areas like genitals and inner thighs
- Full-size clipper with size 10 blade – faster coverage on thick or matted coats, requires practice to avoid nicks
- Ball-tip or blunt safety scissors – hand finishing and spot trimming when the cat is relaxed and still
- Warm damp washcloth – pre-clean stuck debris before trimming; soften dried waste without irritating skin
- Cat-safe shampoo (diluted) – occasional spot cleaning when water alone won’t remove residue; always rinse and dry thoroughly
- Non-slip mat and towels – stable work surface and gentle restraint aid; prevents sliding and gives the cat secure footing
After each session, disinfect clipper and trimmer blades with clipper spray or a diluted pet-safe disinfectant, then apply a drop of clipper oil to prevent rust and keep the blade sharp. Dull blades pull fur instead of cutting it cleanly, which increases discomfort and mat risk.
| Tool | Best Use | Notes |
|---|---|---|
| 5-in-1 trimmer | Sensitive zones, anxious cats | Quieter motor, adjustable guard lengths |
| Size 10 clipper blade | General sanitary trim, moderate coats | 1.5–1.8 mm cut; industry standard for rear work |
| Ball-tip scissors | Finishing edges, spot mats | Only use when cat is still; high nick risk if wriggly |
| Warm washcloth | Pre-trim debris removal | Hold against stuck waste 15–30 sec to soften |
Step-by-Step Rear-Area Clipping Techniques for Cats
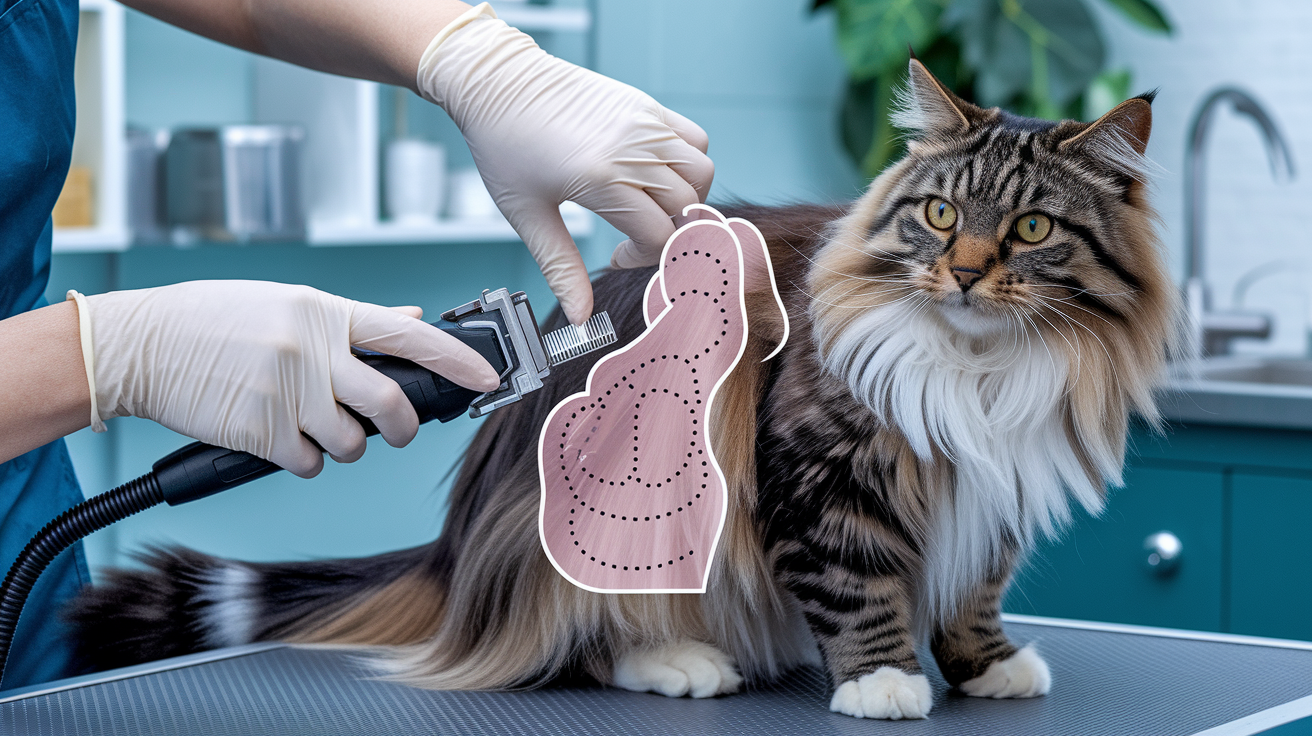
Start under the tail and work outward in small sections. Rushing or trying to trim everything in one pass increases the chance of nicks and makes your cat more anxious for the next session.
Professional groomers often create a triangle-shaped trim zone connecting the inner thighs, lower abdomen, and the area directly under the tail, which gives waste a clear path away from the body. You don’t need to match that precision at home, but the same three zones (tail base, genitals, inner thighs) should guide your trimming order.
Follow these seven steps for a safe, effective sanitary trim:
-
Position your cat on the towel-covered non-slip surface, either standing or gently restrained in a towel wrap with the rear exposed.
-
Lift the tail gently with your non-dominant hand and inspect the fur directly around the anus; use your fingers to hold the tail up and out of the way throughout the trim.
-
Insert two fingers between the skin and the fur you’re about to trim to form a safety barrier, keeping your fingertips between the blade and your cat’s body.
-
Make the first pass under the tail using short, controlled clipper strokes parallel to the skin, removing only a small amount of fur with each pass; work slowly and stop after 30–60 seconds to check your cat’s stress level.
-
Move to the genital area and trim hair on the lower abdomen and around the genital opening using the same finger-barrier and short-stroke technique; use a trimmer instead of full clippers if the area is tight or your cat is especially sensitive.
-
Trim the inner thighs by gently spreading one hind leg at a time and clipping fur on the inside of the leg where it meets the body; this prevents urine from wicking up long leg fur and creating mats.
-
Finish by inspecting your work. Run your fingers through the trimmed area to check for missed clumps, uneven spots, or any nicks, then reward your cat with a treat and a break before addressing any touch-ups.
If you encounter a tight mat during trimming, don’t cut underneath it. Skin can be pulled up inside the mat, and cutting blindly risks a deep laceration. Mark the mat’s location, stop trimming, and schedule a professional groomer to safely remove it with proper tools and restraint.
Hygiene and Aftercare Following a Feline Sanitary Trim
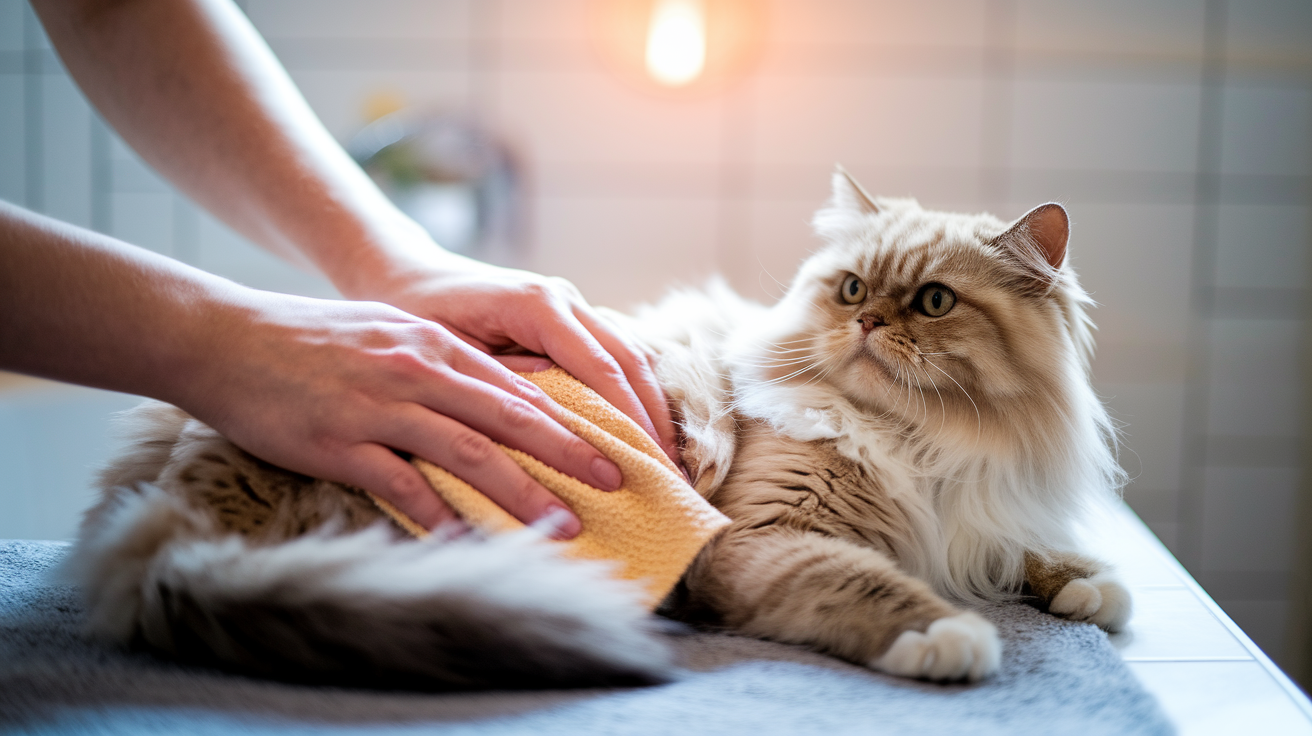
After trimming, use a clean, warm damp cloth to wipe away any loose fur clippings from the trimmed area. If you used clippers, tiny hairs can stick to skin and cause itching, so a gentle wipe prevents your cat from over-grooming the spot and irritating the skin further.
If the area was soiled before trimming and a damp cloth alone won’t clean it, use a small amount of cat-safe shampoo diluted in lukewarm water. Apply the diluted solution with a washcloth, work it gently into the fur, rinse thoroughly with a second damp cloth, then pat the area completely dry with a towel. Any moisture left on the skin can lead to irritation, especially in folds or creases.
Keep these four aftercare steps in your routine:
- Inspect the trimmed skin for redness, tiny nicks, or signs of clipper burn (pink or irritated patches); if you see any, apply a thin layer of plain petroleum jelly or consult your vet for a safe topical.
- Clean and oil your tools immediately after use to prevent bacteria buildup and blade dulling.
- Monitor your cat’s litter-box habits over the next few days. If stool becomes softer, contains blood or mucus, or if your cat strains, call your vet; digestive issues often show up as grooming problems first.
- Watch your cat’s behavior for excessive licking of the trimmed area, scooting, or visible discomfort, which may signal skin irritation or an underlying issue that needs veterinary attention.
Routine Grooming Frequency and Maintenance for Sanitary Areas

Brush long-haired cats at least every few days, and consider a quick daily once-over if your cat’s coat mats easily or if litter sticks after every box visit. During each brushing session, check under the tail and along the inner thighs for snags, sticky spots, or odor. Early detection prevents the need for emergency baths or same-day trims.
A “mini-groom” every four to eight weeks often includes a sanitary trim, paw-pad trim, nail clip, bath, and blow-dry. If your cat’s rear stays clean between brushings, you don’t need to trim. If you’re finding recurrent poop in the fur despite regular brushing, add sanitary trimming to your schedule or book a groomer.
| Coat Type | Recommended Frequency | Notes |
|---|---|---|
| Long-haired (Persian, Maine Coon, Ragdoll) | Every 4–6 weeks or as needed | High mat risk; daily brushing helps extend trim intervals |
| Medium-haired | Every 6–8 weeks or when debris accumulates | Seasonal shedding may require more frequent checks |
| Short-haired | Rarely needed unless health issues present | Diarrhea, obesity, or arthritis may require occasional trimming |
Safety Precautions and Common Mistakes During Cat Sanitary Trims

Never dig clipper blades into skin creases or folds. Hold the skin taut with your free hand, keep the blade flat or angled away from the body, and make shallow passes. Pressing hard or angling the blade inward is the fastest way to nick delicate skin.
Don’t use scissors when your cat is wriggling. A sudden twist can turn a careful snip into a puncture wound. If your cat won’t hold still, switch to guarded clippers or stop and try again later.
Don’t attempt to cut under a matted section of fur. Mats pull skin upward, and you can’t see where the fur ends and skin begins. Leave matted fur for a professional groomer who has the tools and training to safely shave underneath without injury.
Here are five common mistakes that lead to injuries or incomplete trims:
- Trimming in one long session instead of short intervals. Cats tolerate brief work much better; fatigue and stress increase bite and scratch risk.
- Using dull blades that pull and tug instead of cutting cleanly, causing discomfort and making mats worse.
- Skipping the finger-barrier technique. Your fingers between fur and skin catch sudden movements and protect against accidental nicks.
- Ignoring stress signals like growling, tail lashing, dilated pupils, and escape attempts; push through them and you risk injury to both of you.
- Attempting to trim severely soiled or matted fur at home. Waste-caked mats often hide skin infections, sores, or even maggots; these need professional or veterinary care, not DIY trimming.
Special Considerations for Different Cat Ages, Breeds, and Conditions

Long-haired breeds like Persians, Maine Coons, and Ragdolls benefit most from regular sanitary trims because their coat density and length create more surface area for waste to cling to. Even with daily brushing, these cats often need trimming every four to six weeks to stay comfortable and odor-free.
Long-Haired Breed Needs
Persians and Himalayans have extremely dense undercoats and fine, flowing topcoats that mat quickly when soiled. Their flat faces also mean they may have softer stools due to brachycephalic anatomy affecting digestion, so sanitary trims should be part of routine care from kittenhood. Maine Coons and Ragdolls have slightly coarser fur that resists mats better, but their sheer volume of hair still traps litter and feces easily, especially around the “furnishings” on the thighs and belly.
Grooming for Seniors and Mobility-Limited Cats
Senior cats or cats with arthritis groom less effectively because turning to reach the rear is painful or difficult. You may notice more matting, a stronger odor, or visible waste even if your cat was fastidious when younger. For these cats, trimming becomes a comfort and hygiene necessity, not just cosmetic upkeep. Use extra patience during positioning. Arthritic joints don’t bend as easily, so avoid forcing legs into unnatural angles. A groomer experienced with senior cats can often work faster and with less stress than a lengthy at-home session.
Safety Adjustments for Kittens
Kittens are smaller, wigglier, and less predictable than adult cats, so sanitary trims require lighter touch and slower movements. Use a trimmer instead of full-size clippers to avoid overwhelming a kitten’s sensitive hearing, and keep sessions under one minute until the kitten learns that grooming ends with treats and freedom. If a kitten is using a litter box and has long fur, start sanitary trims early so the routine feels normal rather than frightening by adulthood.
When Professional or Veterinary Grooming Is Necessary

If you find mats so tight they’ve formed a solid, felted blanket or you can’t slip a comb or finger between the mat and your cat’s skin, book a professional groomer. Attempting to cut these at home almost always results in deep skin cuts because the mat pulls skin upward and you can’t see the boundary.
Red, raw, or weeping skin under mats signals infection or severe irritation that needs veterinary attention before or alongside grooming. Same goes for any foul smell that doesn’t improve after cleaning, visible sores, or discharge that isn’t normal feces.
If you see tiny white rice-like segments stuck in the fur near the anus, those are likely tapeworm segments. Clean the area, note what you saw, and call your vet for deworming medication and a flea-control plan, since tapeworms usually come from ingesting fleas. If you notice fly eggs (tiny yellowish clusters) or live maggots in matted fur, seek emergency veterinary care immediately. This condition, called myiasis, can cause life-threatening infection within hours.
Here are four urgent cases that require professional or veterinary intervention:
-
Severely matted coat that covers large areas of the body or has pulled skin into tight, painful knots. Professional groomers use specialized mat-removal tools and sedation options when necessary.
-
Visible wounds, sores, or bleeding under or near mats. Veterinary care is required to treat infection, assess tissue damage, and provide pain relief before grooming.
-
Presence of maggots or fly eggs. This is a medical emergency requiring immediate vet attention, antibiotics, wound care, and often intravenous fluids.
-
Aggressive or extremely fearful behavior. Cats who bite, scratch violently, or panic to the point of injuring themselves need professional grooming with proper restraint, or veterinary sedation for safe handling and thorough examination.
Supplies and Quick-Reference Checklist for Sanitary Grooming
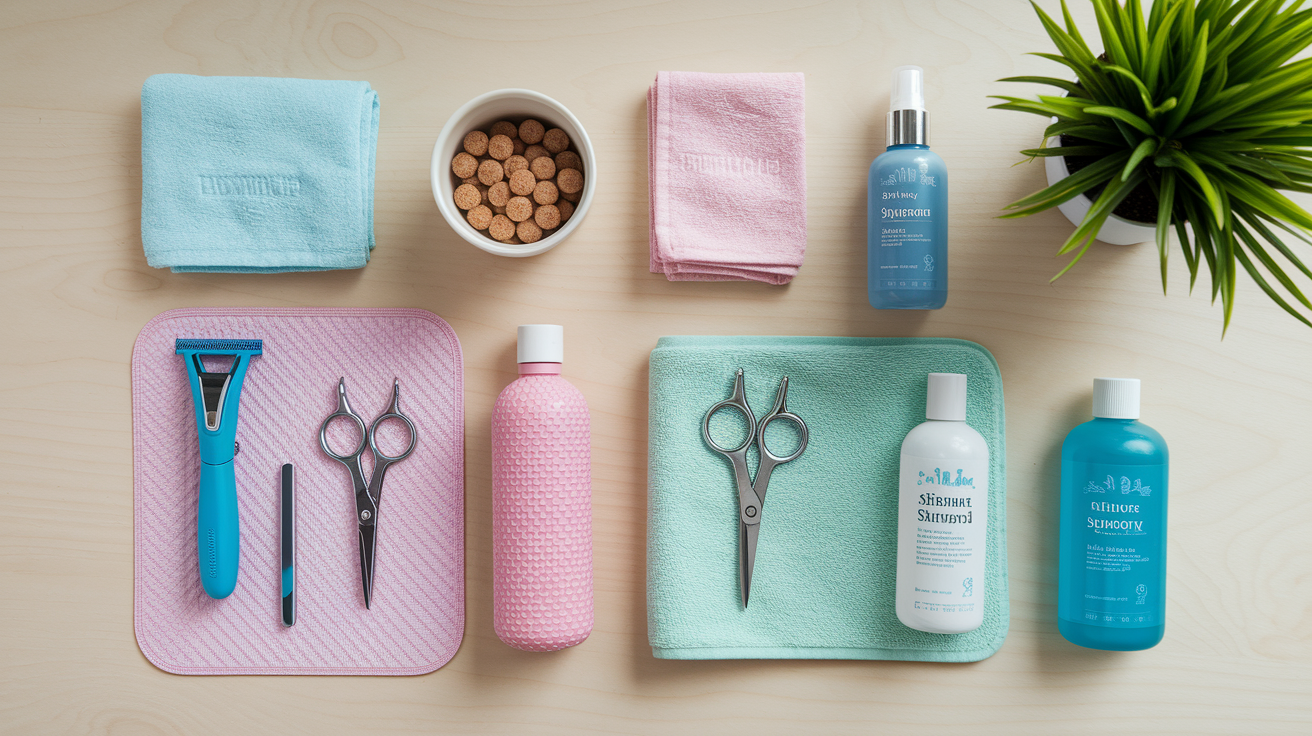
Gather all your supplies before you bring your cat into the grooming space. Stopping mid-trim to hunt for scissors or treats breaks your cat’s tolerance and resets the stress clock, so preparation matters.
Use this checklist every time you plan a sanitary trim at home:
- Cordless trimmer or clipper with size 10 blade
- Ball-tip safety scissors for finishing (optional, only if cat is calm)
- Two clean towels (one for the work surface, one for drying)
- Non-slip mat or rubber shelf liner
- Treats your cat loves (small, quick to eat)
- Warm water and a stack of damp washcloths
- Cat-safe shampoo, pre-diluted in a small bowl if needed
- Clipper disinfectant spray and clipper oil for post-session tool care
Final Words
Start with the areas that matter most: under the tail, around the anus, and the inner thighs. This post gives quick hygiene guidance, calm prep steps, and a simple five-step setup to start safely.
Use guarded clippers or ball-tip scissors, work in short micro-sessions, and clean the area with a warm, damp cloth after trimming. Watch for redness, stuck debris, or stress signals and stop if needed.
If mats or raw skin show up, see a groomer or vet. A regular sanitary trim for cats keeps them cleaner and more comfortable.
FAQ
Q: Do cats need sanitary trims and what is a hygiene cut for cats?
A: Cats need a sanitary trim when fur around the anus, under the tail, or inner thighs traps feces, mats, or odor. A hygiene cut trims those zones short to prevent sticking, mats, and skin irritation.
Q: How much is a sanitary trim for a cat?
A: A sanitary trim for a cat typically costs $10–$40 at a groomer; veterinary or sedated trims can run $40–$150 depending on location, the cat’s temperament, and extra services.
Q: What is the 3-3-3 rule for cats?
A: The 3-3-3 rule for cats means three days to adjust and hide, three weeks to start settling and show routine, and three months to feel fully settled and bonded in a new home.