
Think trimming your cat’s nails will end in scratches and drama?
It doesn’t have to be that way.
With calm prep, the right tools, and tiny conservative cuts, you can trim at home without making your cat hate you—or cutting the quick (the blood vessel inside the nail).
This post gives a step-by-step plan: how to hold paws, where to cut, gentle restraint methods, what to have on hand, when to stop and ask for help, and short routines that fit busy lives so you know exactly when to call the vet.
Step-by-Step Instructions for Safe Cat Nail Trimming at Home

Home nail trimming gets way easier once you’ve done it a few times and learned where to stop. Most cats won’t love it, but they’ll tolerate the process if you stay calm, trim conservatively, and quit before things escalate.
The most important safety rule? Find the quick (that’s the pink blood vessel inside the nail) and stay at least 1–2 millimeters away from it. If you cut into it, your cat’s going to feel pain and bleed. Better to trim less than risk going too far.
Here’s how to do it:
-
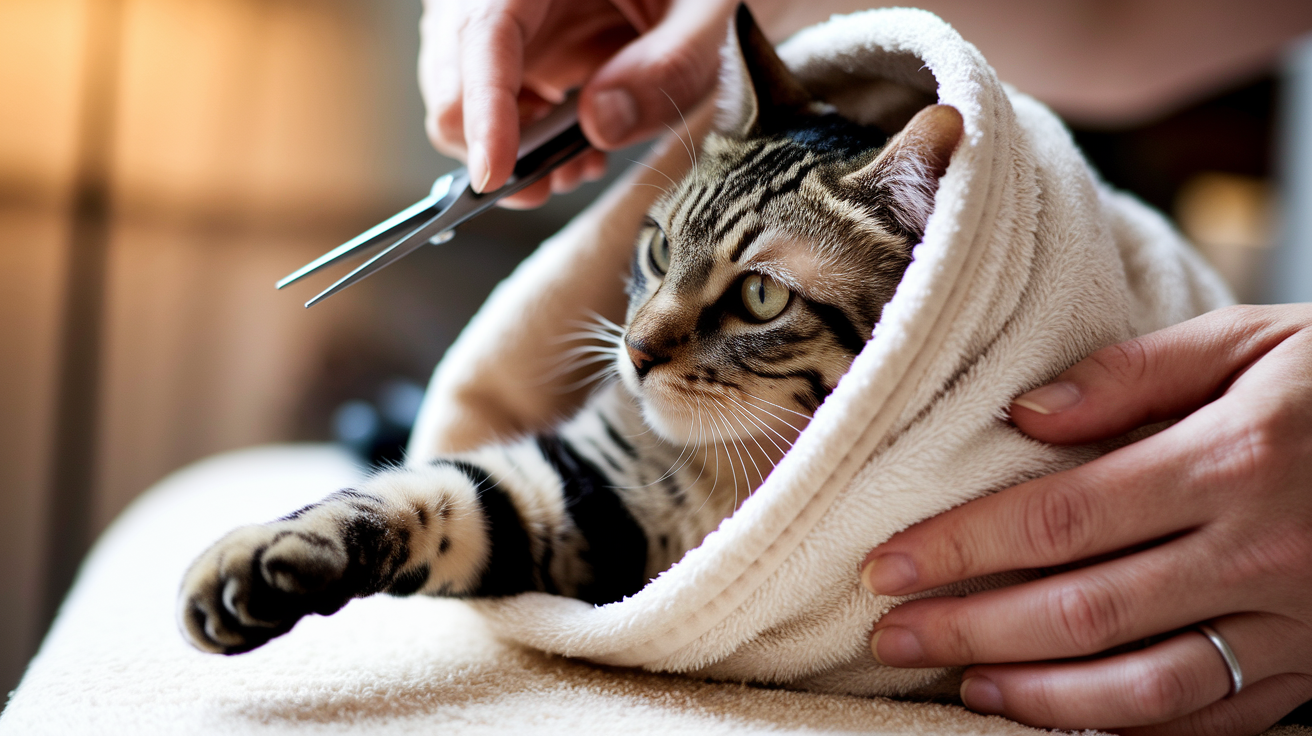
Get a good hold without being aggressive. Settle your cat in your lap or on a table, facing away from you. If they’re squirmy, wrap them loosely in a towel and leave one paw out.
-
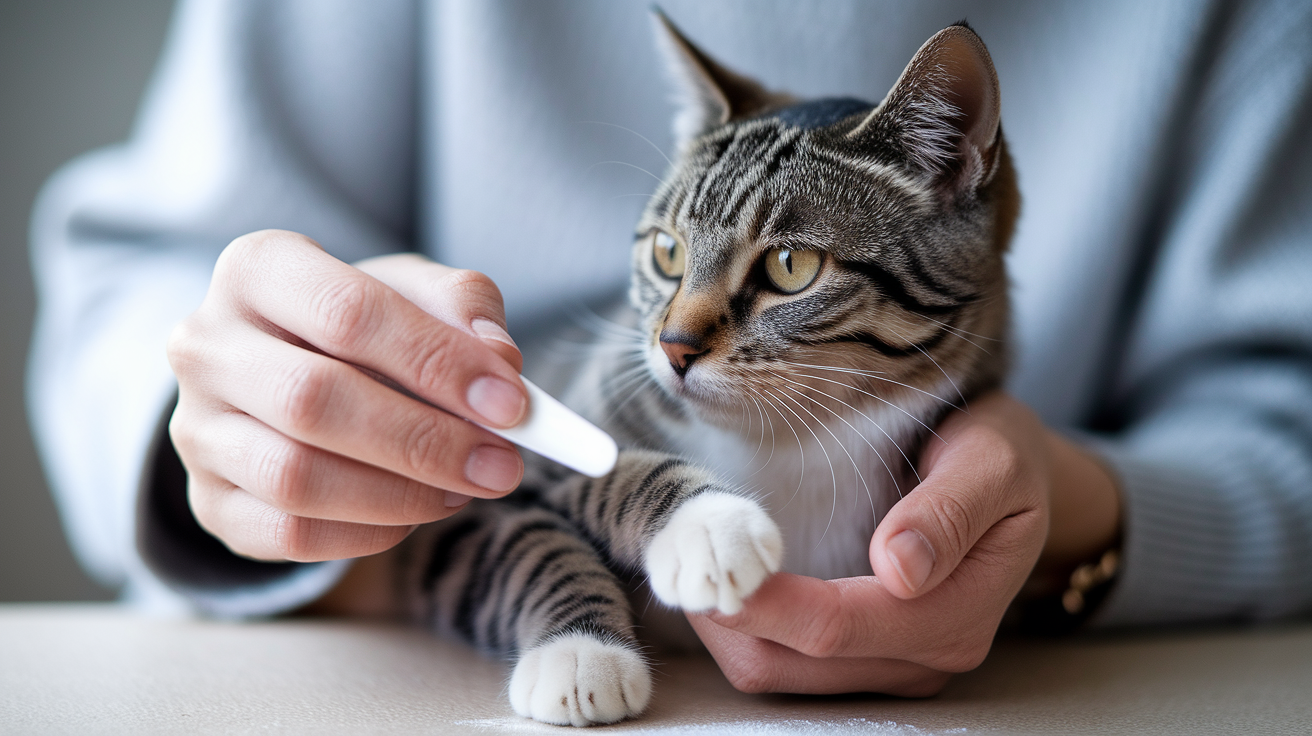
Make the claw extend. Press gently on the top of the paw and the toe pad at the same time. The nail slides right out.
-
Angle the clipper at 45 degrees. This keeps the nail flat when your cat walks and prevents weird splits or discomfort.
-
Trim just the clear tip. On light nails, cut 1–2 millimeters before you see pink. On dark nails, take off tiny bits and watch for a small dark oval or texture change. That means you’re close to the quick.
-
Move through each nail, but don’t push it. If your cat’s chill, finish all four paws. If they start pulling away or getting tense, stop. You can finish later.
-
Treat right after. Give them something good and speak calmly. You’re building a positive association here.
Indoor cats usually need trims every 2–4 weeks since their nails don’t wear down on carpet. Outdoor cats can go longer. If you hear clicking on hard floors or see claws when they’re resting, it’s time.
Essential Tools and Supplies for Cat Nail Trimming

You don’t need much, but what you do need should actually work. Cheap clippers can crush the nail instead of cutting cleanly, and that makes everything worse.
What to have ready:
- Scissor-style clippers. Small, curved blades with a notch that cradles the nail. Easy to control. Around $8–$15.
- Guillotine-style clippers. A sliding blade cuts through a round opening. Stays sharp longer but needs careful positioning. Around $5–$12.
- Plier-style clippers. Spring-loaded handles for thick or tough nails. Not common for cats but helpful for seniors. Around $10–$25.
- Electric nail grinder. Files nails gradually. Some cats hate the vibration, others prefer it to the snap of clippers. Around $20–$70.
- Styptic powder. Stops bleeding fast if you nick the quick. Around $5–$15. You can also use a bar of soap or cornstarch in a pinch.
- Clean towel. For gentle restraint or pressure if there’s bleeding.
- Cat treats. High value ones. This is bribery, and it works.
Keep everything in one spot so you’re not hunting around mid-session while holding a wiggling cat.
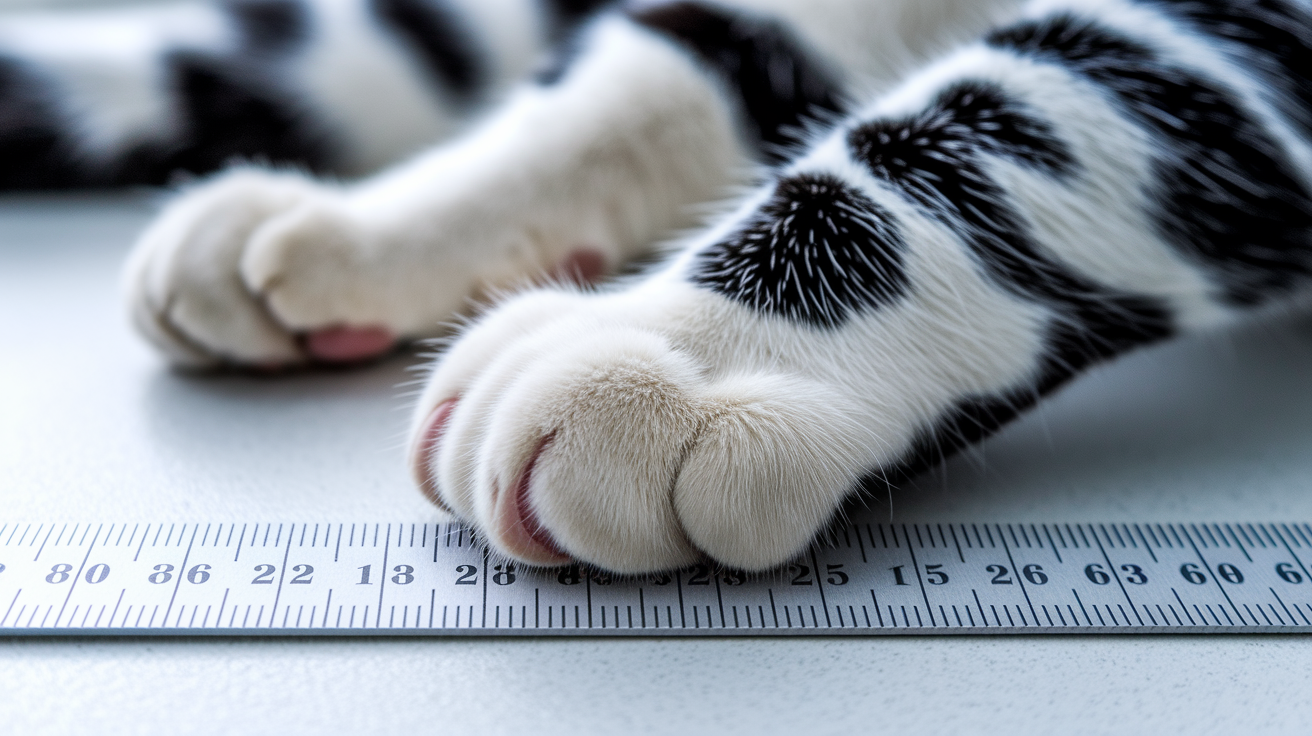
Cat Nail Anatomy and How to Identify the Quick
You need to know what you’re looking at before you start cutting.
Each nail has a hard outer shell and an inner quick, which is basically a bundle of blood vessels and nerves. The quick keeps the nail alive, so cutting into it hurts. Your job is to remove only the dead, translucent tip that sticks out past the quick.
| Nail Color | Quick Visibility | Safe Trimming Guidance |
|---|---|---|
| Light or translucent nails | Quick shows up as a pink line or triangle inside the nail | Cut 1–2 mm before the pink area. Easy to see where to stop. |
| Dark or black nails | Quick is hidden. You’ll see a small dark oval or texture change as you get close. | Trim tiny amounts at a time. Stop when you see the dark oval. |
For dark nails, remove 1–2 millimeters, then check the cut surface. When you’re getting close to the quick, the center of the nail changes from solid and dry to slightly moist or darker. That’s your cue to stop.
If you’re not sure, trim less. Nails grow back. You can always take off more next time. Cut too much once and your cat will remember it.
Preparation and Paw Handling Techniques Before Trimming

Good prep makes the actual trimming faster and way less stressful.
Pick a quiet room with decent lighting. No TV blaring, no other pets wandering in. Choose a time when your cat’s naturally calm. Right after a meal, during an afternoon nap, or after a play session that burned off energy.
What to do before you start:
- Practice paw handling for a few days first. Gently hold each paw for a few seconds, press the toe pad to extend the nails, then let go and give a treat. Do this 5–10 times a day until your cat doesn’t care.
- Get everything ready before you grab your cat. Clippers, styptic powder, treats, towel. All within arm’s reach.
- Use a stable surface. A table, countertop, or your lap. Not something slippery.
- Keep it short at first. Plan for 2–5 minutes. Trim 2–4 nails if your cat’s new to this. You can finish the rest later.
- Work in good light. Natural daylight or a bright lamp helps you see the quick, especially in dark nails.
To extend a claw, hold the paw gently and press on the top with your thumb while pressing the toe pad with your forefinger. The nail slides out. Let go as soon as you’ve trimmed that nail, give the paw a gentle rub, move to the next one. Short, calm touches build trust.
Safe Restraint and Calming Methods for Sensitive or Fearful Cats
Some cats need a little help staying still. The trick is keeping them secure without adding stress.
Tight grips, yelling, or forcing them to keep going when they’re clearly upset will make future sessions impossible. Use the minimum restraint you need, stop if they’re truly distressed, and always pair it with treats and calm words.
Towel Wrap (“Purrito”) Method
Wrap your cat snugly in a towel, leaving one paw out at a time. This works well for cats that squirm or try to grab the clippers. Hold the wrapped cat gently against your body, pull out one paw, trim 2–4 nails, tuck that paw back in, expose the next one. Keep the wrap snug but not tight. Your cat should breathe easily and be able to shift a bit. If they start panting or thrashing, unwrap them immediately.
Two-Person Support Technique
One person holds and soothes while the other trims. The holder cradles the cat in their lap or on a table, speaks softly, offers treats. The trimmer focuses on quick, precise cuts. This helps a lot for wiggly cats or first-timers who need both hands free. Switch roles if one of you is better at calming and the other is steadier with tools.
If your cat hisses, swats hard, or tries to bolt, stop. Trim just 1–2 nails, reward heavily, build up tolerance over the next week with short daily practice. Forcing a full session when they’re terrified damages trust and makes every future trim harder.
How Often to Trim Cat Nails and Signs They’re Too Long
Most indoor cats need trims every 2–4 weeks to avoid overgrowth, snagging, and discomfort.
Outdoor cats and very active indoor cats might naturally wear down their nails on rough surfaces, so they can go 4–6 weeks. Kittens grow nails faster and may need weekly checks until they hit adult size around 6–9 months.
Signs your cat’s nails are too long:
- Claws are clearly visible when the cat’s lying down, curving past the paw pad
- Nails snag on carpets, blankets, furniture, or your clothes when they walk or jump
- You hear clicking on hard floors as they move
- Nails curve sharply inward, touching or growing into the toe pad (this hurts and can cause infection)
- The cat avoids the scratching post or seems uncomfortable when scratching
If you notice any of this, trim soon. Overgrown nails that curl into the paw pad can puncture skin, leading to infection, limping, and vet bills. Regular trimming keeps things healthy and prevents complications.
What to Do if You Accidentally Cut the Quick
Even careful trimmers nick the quick sometimes, especially on dark nails where you can’t see the blood vessel.
If you see blood or your cat flinches and yanks their paw back, stay calm. Bleeding from a clipped quick usually stops within a few minutes if you act fast.
How to stop bleeding:
-
Apply styptic powder directly to the nail tip. Dip the bleeding nail into the powder or pack a pinch onto the cut. Hold gentle pressure with a clean towel for 1–3 minutes.
-
No styptic powder? Use a bar of soap or cornstarch. Rub the bleeding nail across a dry bar of soap to coat the tip, or pack cornstarch or flour onto the nail and hold pressure.
-
Keep your cat calm and still. Distract with gentle petting or a treat. Movement can restart bleeding.
-
Check after 5 minutes. If it’s stopped, let your cat rest quietly for 15–20 minutes. No playing or jumping.
If bleeding continues past 10–15 minutes, or if you see swelling, heat, or pain the next day, contact your vet. Most quick nicks heal completely in a few days, but check in if you’re unsure.
Alternatives to Home Trimming and When to Seek Professional Help

Home trimming isn’t the only option. And it’s not always the right choice for every cat or owner.
If your cat becomes highly aggressive, if you’ve tried desensitization for 2–4 weeks with no progress, or if you’re just not confident, professional help is smart and responsible.
Other options:
- Scratching posts and boards. Provide vertical posts at least 30–36 inches tall and horizontal cardboard scratchers. Regular scratching naturally wears down the outer nail sheath, cutting down how often you need to trim. It won’t eliminate trimming, but it helps.
- Nail caps (soft claws). Small vinyl caps glue onto each trimmed nail and last 4–6 weeks. They prevent scratching damage. Packs of 20 cost around $8–$18. You trim first, then apply adhesive and caps.
- Electric nail grinders. Grinders file gradually instead of cutting, which some cats handle better. Use low speed, keep it moving to avoid heat buildup, reward frequently. Works well for cats that panic at the snap sound of clippers.
- Professional groomer or vet tech. Schedule trims every 4–8 weeks at a grooming salon or vet clinic. Professionals handle even difficult cats safely. Costs typically run $10–$25 per visit. Sedation’s rare and only used when absolutely necessary.
Get professional help right away if you notice nails curling into the paw pad, signs of infection (redness, swelling, discharge, limping), or if bleeding won’t stop after 15 minutes. Groomers and vet staff are trained to trim quickly and calmly, even on cats that won’t cooperate at home.
Final Words
In the action, we ran a simple step-by-step trimming process and covered the right tools, how to find the quick, paw handling, calming methods, timing, and quick first aid.
Keep the 45-degree angle and stay 1–2 mm from the quick. Press the pad to extend the claw. Stop if your cat struggles and trim indoor cats every 2–4 weeks.
Jot a few notes after each session so you can watch progress and share details with your vet if needed. With steady practice, you’ll gain confidence in how to trim cat nails safely.
FAQ
Q: What is the safest way to trim cat nails?
A: The safest way to trim cat nails is to press the toe pad to extend the claw, cut at a 45-degree angle 1–2 mm from the quick, use proper clippers, and stop if she struggles.
Q: What can I use to sedate my cat to cut her nails? How to cut an unwilling cat’s claws?
A: To cut an unwilling cat’s claws or sedate her, try calming steps first: quiet room, short sessions, towel wrap or two-person support, treats, and gentle handling; use vet-prescribed sedatives only with a vet.
Q: Is it necessary to trim your cat’s claws?
A: Trimming your cat’s claws is necessary for many indoor cats to prevent snagging, clicking, and inward curling; most indoor cats need trims every 2–4 weeks, with scratching posts as helpful alternatives.