
Think an automatic pet feeder will solve all your feeding problems and never fail?
It can help a lot, but only if you set it up right.
This post gives simple, step-by-step setup instructions so your feeder actually works when your pet needs it.
You’ll learn how to assemble the parts, power it, set the clock and schedule, run test dispenses, tweak portion sizes, and introduce your pet without stress.
We’ll also cover cleaning, quick fixes for jams, and when to call support so meals stay on time and your pet stays happy and safe.
How to Set Up Your Automatic Pet Feeder: Step-by-Step

Most automatic feeders show up in pieces. You’ll need to snap them together before your first feeding. Pull everything out of the box and look for the hopper, bowl, power adapter or battery slot, and whatever instructions came along.
-
Assemble the base and bowl. Click the bowl or tray into the platform. The bowl lip needs to sit right. If it’s crooked, food gets stuck in the chute instead of landing where your pet can actually eat it.
-
Install batteries or plug in the power cord. Go with alkaline batteries if you can, not rechargeable. Even if you’re using the wall plug, load backup batteries so meals keep coming during power outages.
-
Attach the food hopper. Snap or twist it onto the top. Make sure it locks and the lid closes tight so your kibble doesn’t go stale.
-
Load a small amount of food. Pour in one or two cups of kibble. Don’t fill it all the way yet. You want to test how it dispenses first.
-
Set the current time. Use the buttons or app to punch in today’s date and the correct hour. If the clock’s wrong, every meal will be off.
-
Run a manual test dispense. Hit the feed-now button and watch kibble drop into the bowl. Nothing coming out? Check the chute and make sure the bowl’s seated right.
-
Adjust kibble size if needed. Some feeders can’t handle really big pieces. If your kibble’s too large or moist, it’ll stick in the chute and the motor will reverse to clear the jam.
-
Confirm the feeder is stable. Put it on a flat surface where your pet normally eats. If it wobbles, they might knock it over or just refuse to go near it.
-
Lock the control panel. Most ship unlocked. Hold the lock button for three seconds so your dog or cat can’t paw their way to extra snacks.
First-time mistakes? Forgetting to unlock the panel before you program anything. Seating the bowl wrong so food jams. Using rechargeable batteries that die faster. Skipping the test dispense. And always double-check the clock after a power blip, because a lot of feeders reset to midnight and start serving breakfast at 3 AM.
Programming Feeding Times and Schedules
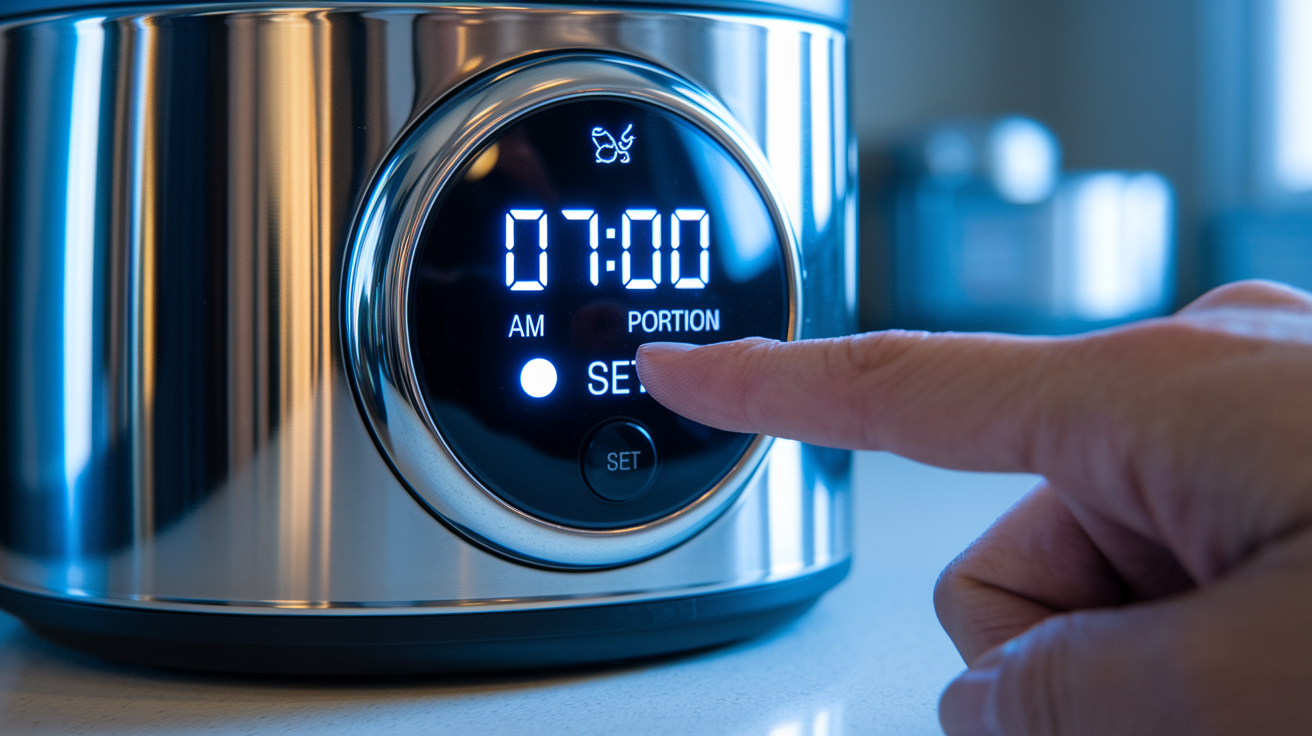
Digital timers let you set multiple meals each day and assign a portion to each one. Most feeders support six or eight meals per day. The schedule repeats every 24 hours, so you don’t need to reprogram it every morning.
Press the SET button until the meal field starts flashing. Use the arrows to pick how many meals you want, then hit SET. The display moves to the first meal time. Scroll to the hour, check the AM or PM, press SET. The minutes flash next. Pick the exact minute, press SET again. Now the portion field shows up. Choose a number between one and fifteen, press SET. The feeder jumps to meal two and you do it all over again.
• Don’t schedule meals less than four hours apart. Back to back feedings can cause overeating or leave your pet anxious, staring at the bowl.
• Keep times consistent. Cats and dogs do better with routine. Breakfast at 7:00 AM today means 7:00 AM tomorrow too.
• Write your schedule down. Keep a note on your phone or tape something to the fridge so pet sitters know the plan.
• Check if the timer saves settings after you unplug. Some do, some don’t. Test it by unplugging for 30 seconds and seeing if your schedule’s still there.
• Run one manual dispense right after programming. Clears any air gaps in the chute so the first scheduled meal actually drops.
Adjusting Portion Sizes and Feed Control
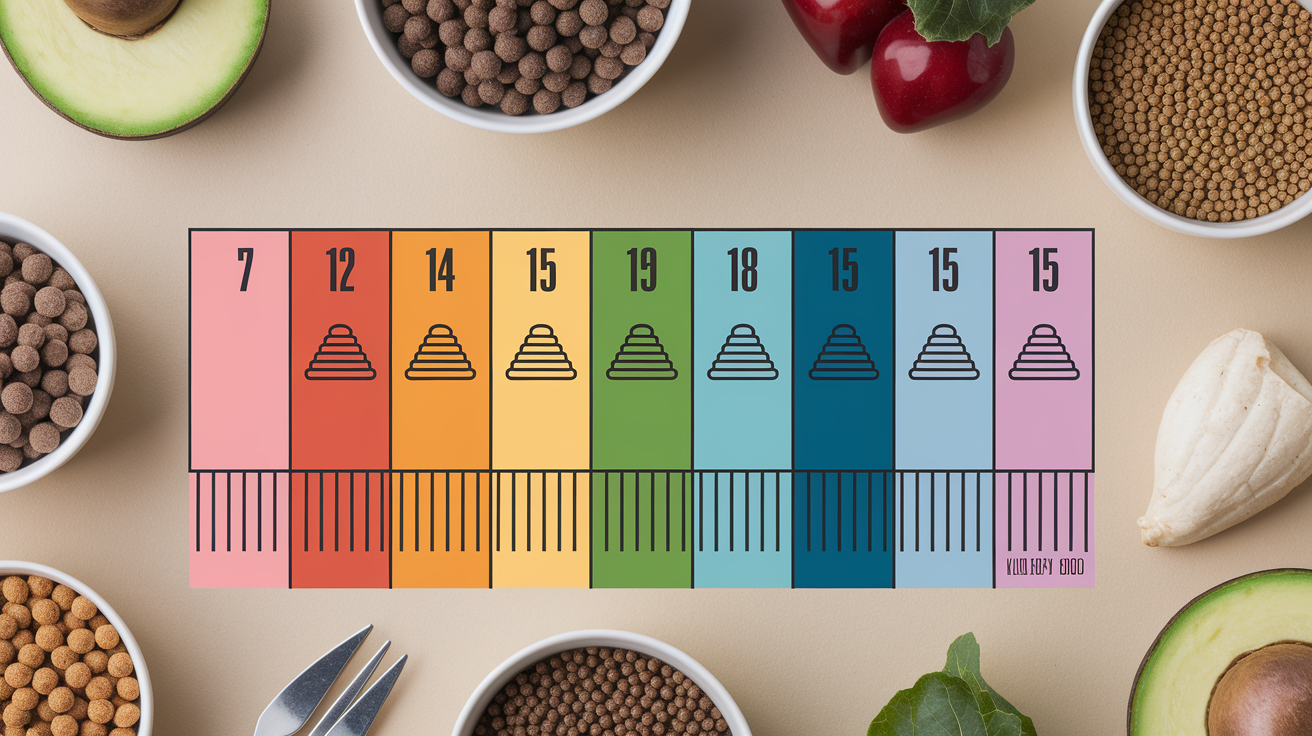
Portion settings are numbered units, not grams or cups. One “portion” can mean different volumes depending on kibble shape and feeder design. To figure out the right number for your pet, measure kibble with a scale or measuring cup, dispense one portion, and compare. If portion five gives you a quarter cup and your cat needs half a cup per meal, set it to portion ten.
| Portion Setting | Approximate Volume | Notes |
|---|---|---|
| 1–3 | 1–2 tablespoons | Good for small cats or snack mode; may leave kibble in chute |
| 5–8 | 1/4–1/2 cup | Standard meal size for most cats and small dogs |
| 10–15 | 1/2–1 cup | Larger portions for medium dogs; verify chute can handle volume |
Adjust when you switch brands, when your pet’s activity changes, or if your vet says to feed by calories instead of volume. Weigh your pet every two weeks during the switch. Watch for weight gain or loss. If your cat’s losing muscle or your dog seems constantly hungry, bump portions up by one or two units and check again in a week.
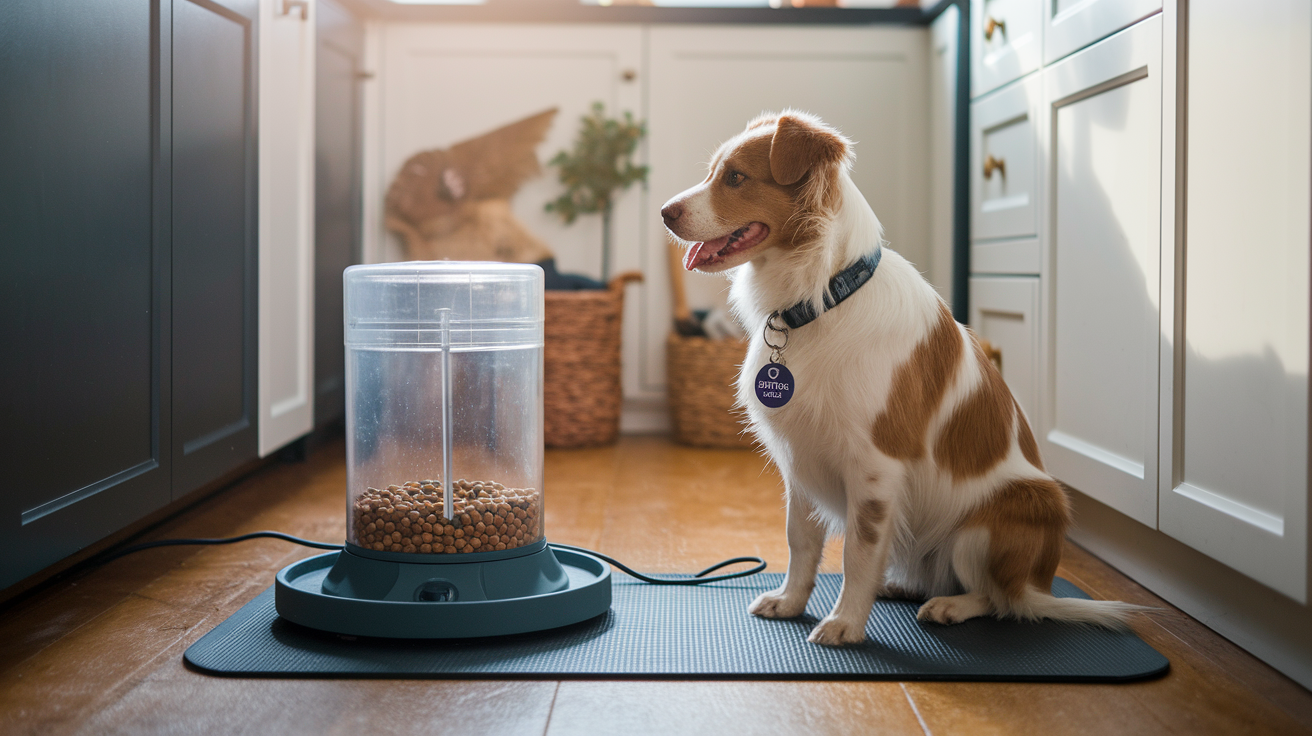
Helping Your Pet Transition to an Automatic Feeder

Put the feeder where your pet usually eats. Keep the old bowl nearby for a few days. Let them sniff it, paw at it, sit next to it. No pressure. Once they seem curious or just don’t care, fill the feeder bowl by hand during a normal meal so they connect the new thing with food they already trust.
After a few days of hand-filling the new bowl, turn the feeder on and program just one automatic meal per day. Keep hand-filling the others. When the scheduled meal drops, stay close and offer a treat or quiet praise the second kibble hits the bowl. If they startle at the motor, run a few test dispenses while you’re there and reward calm behavior. Add a second automatic meal, then a third, until the feeder handles the full schedule and your pet eats without hesitation.
• Pair the sound with something good. Drop a few high-value treats into the bowl right after the motor runs so they learn the noise means food, not fear.
• Don’t ditch the old bowl too soon. Keep it around for at least a week in case they refuse the new setup.
• Watch for stress. Hiding, skipping meals, vomiting, restlessness. If you see any of that, you’re moving too fast. Slow down and add more hand-fed days.
• Use shaping for nervous pets. Reward for looking at the feeder, then stepping close, then eating one kibble. Build confidence in small pieces.
Cleaning and Maintaining the Feeder
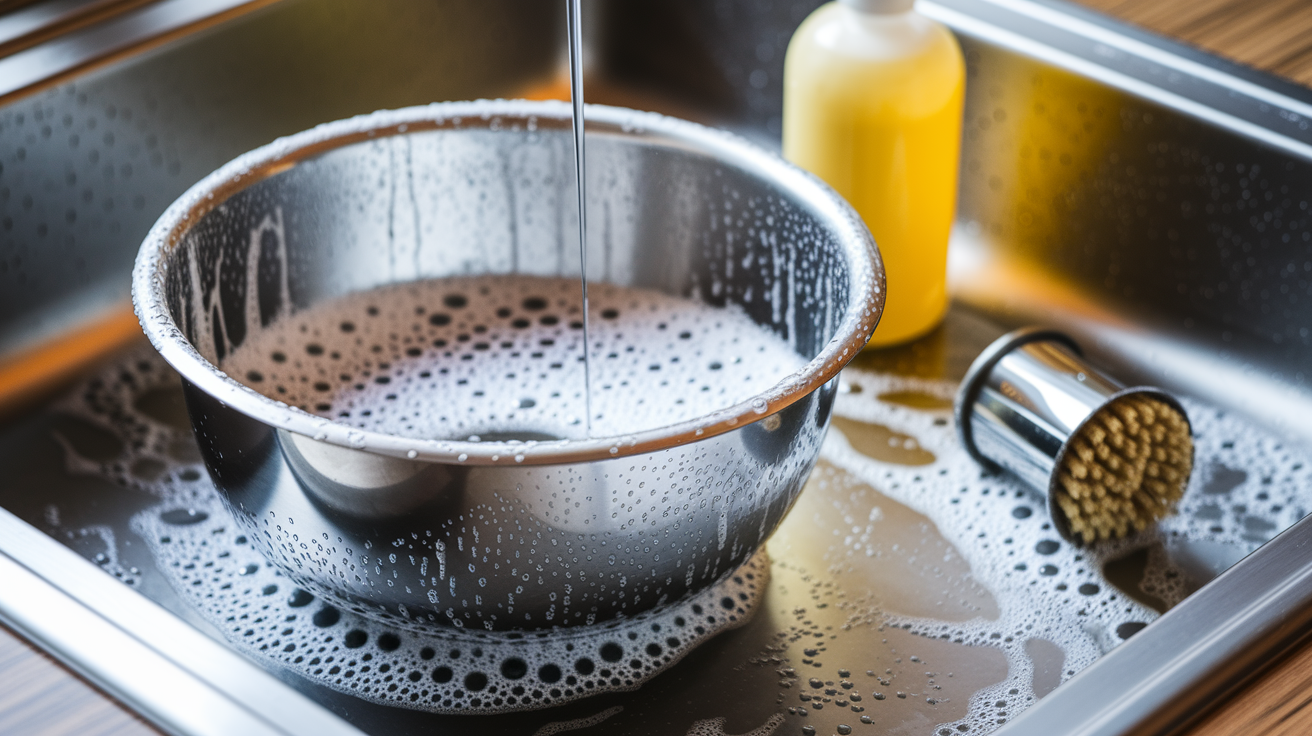
Dirty bowls and hoppers grow mold, attract bugs, and contaminate fresh kibble with stale oils. Cleaning keeps food safe and prevents your pet from refusing meals because the thing smells off.
-
Unplug the feeder or pull the batteries. Always disconnect power before cleaning so you don’t trigger accidental dispenses or short something out.
-
Remove the bowl and dump leftover kibble. Don’t pour old food back into the hopper. Toss it or set it aside for immediate use.
-
Wash the bowl with mild dish soap and warm water. If it’s dishwasher safe, top rack. For cats prone to chin acne, use stainless steel and wash at least twice a week.
-
Wipe the hopper inside with a damp cloth. Don’t submerge it unless the manual says it’s waterproof. Use a food-safe disinfectant if you’re switching between wet and dry.
-
Clean the chute and dispenser opening. Bottle brush or damp cotton swab works. Clear dust, kibble bits, and oils that cause jams.
-
Dry everything completely before putting it back together. Moisture trapped in the hopper or chute makes kibble swell and clog.
For dry food only, clean the bowl and hopper monthly. Wet or canned? Clean weekly. Check the motor and gears every few months. Listen for grinding or slower dispensing. That can mean worn parts that need lube or replacement. Replace backup batteries once a year even if they still work. Inspect cords for fraying or bite marks. If your feeder connects to an app, update firmware when it asks. Fixes bugs, improves accuracy.
Troubleshooting Common Issues

Feeders jam, skip meals, or drop the wrong amount when kibble size, power, or programming’s off. Most problems are quick fixes.
| Issue | Likely Cause | Basic Fix |
|---|---|---|
| Food jammed in chute | Kibble too large, too moist, or bowl misaligned | Clear chute, check kibble size, reseat bowl, run test dispense |
| Feeder skips a scheduled meal | Clock reset after power outage or incorrect AM/PM | Verify current time and AM/PM, reprogram meal schedule |
| Portions too small or too large | Portion calibration off or kibble density different from last brand | Measure actual output, adjust portion number up or down by 2 units |
| App won’t connect or shows offline | Wi-Fi issue, firmware out of date, or wrong login account | Check router, update app, restart feeder, reinstall app if needed |
If the anti-jam motor runs constantly or the feeder’s grinding, turn it off and check the chute and hopper for anything stuck. If portions stay wrong after recalibration, the dispenser wheel or sensor might be damaged. You’ll need professional repair. Contact support when basic fixes don’t work, the timer resets every day despite fresh batteries, or the app throws errors you can’t clear by restarting.
Safety and Best Practices for Daily Use
Set the feeder on a flat surface away from water bowls and litter boxes. If your pet’s large or playful, secure the base with a non-slip mat or museum putty so it won’t tip. Make sure the power cord’s out of reach and not running under furniture where they could chew through it.
Use only pet-safe materials for anything touching food. Avoid sharp edges on the bowl rim or chute. Confirm plastic parts are BPA-free if your pet has sensitivities. For multi-pet homes, consider feeders with ID-collar sensors or locking lids so one animal can’t steal another’s portions.
• Check the bowl every day. App alerts can say food was dispensed even if your pet didn’t eat it. Not eating is an early illness signal.
• Keep the feeding area clean. Spilled kibble attracts pests and spoils faster than sealed hopper food.
• Don’t use the feeder as a substitute for watching appetite. Automatic feeding makes it harder to notice when your pet skips a meal or eats less than usual.
• Store extra kibble in a sealed container near the feeder. Refill the hopper before it runs empty so you never miss a scheduled feeding.
Final Words
Get the feeder working. Assemble, plug it in, load the hopper, and run a test dispense. Then program feeding times, set portions, and help your pet adjust with small steps and rewards.
Keep the unit clean, watch for jams, and follow placement and power safety. Track meals, appetite, and behavior for a few days so you can fine-tune servings and schedule.
If you want a quick reminder of how to use an automatic pet feeder, follow the steps above and you’ll soon have a steady, worry-free mealtime routine.
FAQ
Q: How to use an automatic dog feeder?
A: Using an automatic dog feeder involves assembling and powering it, filling the hopper with the right kibble, programming times and portions, running a test dispense, and watching your dog for the first few days.
Q: Can I leave my cat alone for 2 days with an automatic feeder?
A: Leaving your cat alone for two days with an automatic feeder can work if you also provide fresh water, a clean litter box, enough food, and someone to check once daily; avoid for kittens, sick, or anxious cats.
Q: How do automatic pet feeders work?
A: Automatic pet feeders work by storing food in a hopper and using a timer-driven motor or auger to release measured portions at set times; smart models add apps, sensors, or cameras for control and monitoring.
Q: Do vets recommend automatic feeders?
A: Veterinarians often recommend automatic feeders to keep meal times steady and control portions, especially for weight management, but they caution against sole use for pets needing medical monitoring or close observation.